
How to: Change a Guitar String (locking tuners) – with pictures
In this article I explain how to change a guitar string for guitars with PRS style locking tuners.
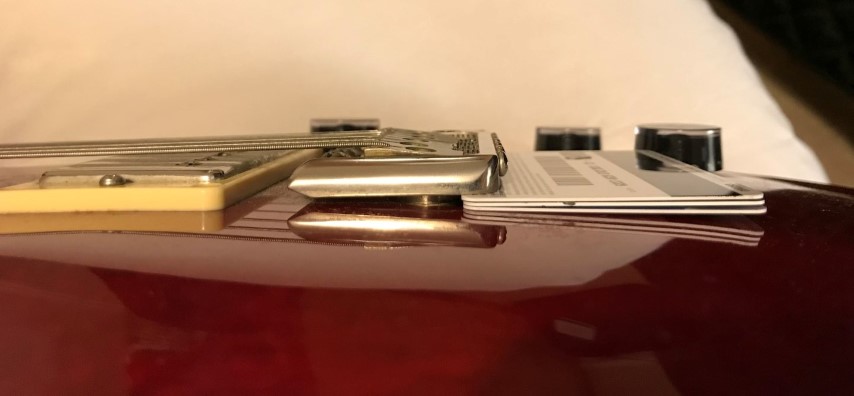
Step 1 – Securing the floating bridge
You can skip this step if you’re just changing one string, or if you have a fixed bridge. If you want to remove all the strings (I did as I wanted to give my fretboard a good cleaning), the easiest way to maintain tension on your tremolo bridge is to slide a couple of credit cards under the bridge. This will make tuning up a lot easier after you’ve changed the strings.
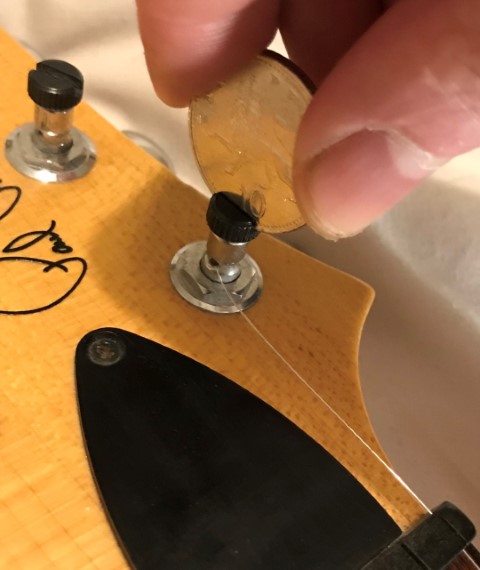
Step 2 – Removing the old strings
Loosen your strings by the tuning pegs until they’re slack and then use a coin to loosen the locking screw on each tuner. You should then be able to carefully pull each string free of its tuner and push it out through the bridge.
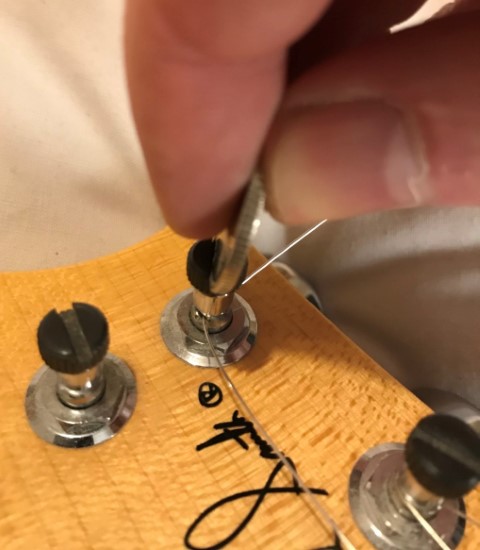
Step 3 – Align the tuning posts
Rotate your tuning pegs until the hole on the tuner post is perpendicular to the neck (i.e. all the holes are facing inwards in this image).

Step 4 – New strings:
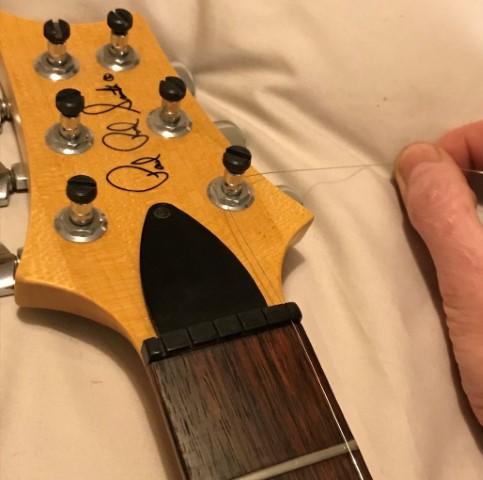
Open up your packet of new strings. I swear by Ernie Ball, and on this guitar I use their Regular Slinky strings. You can start with any string, but I generally go from highest (thinnest) string to lowest (fattest). Find the string with the smallest number in the pack – for me this is the 0.010 inch. Uncoil the string and pass it through the bridge (pointy end first), so that the ball end of the string sits within the bridge (exact location depends on the type of guitar).
Pass the pointy end through the hole in tuning post, and pull the string semi tight with your hand (not too tight, you just need to relieve some of the slack). Note, with locking tuners like these you don’t need to wrap the string around the tuning post at all.
While you maintain a slight tension on the string, twist the locking screw with your other hand until it’s finger-tight.
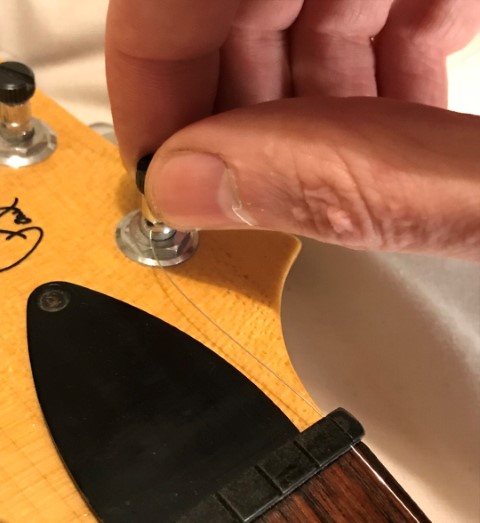
Using a coin, give the locking screw an additional eighth to a quarter of a turn (more of a turn on the lower strings). You don’t want to overtighten this as the internal screw can ‘bite’ into the string, weakening it and creating a breakage point.
You’re now ready to tune up. I usually tune the string to roughly the right pitch, but there’s no point being accurate at this point as the pitch will change as you add the remaining strings and as stretch them out.
Trim the loose end with a pair of wire cutters. I leave about 1 cm of string beyond the tuning post. You can then bend the ends back on themselves with a pair of plyers – not only does this stop you poking yourself in the hand with the sharp ends, but it prevents the windings unravelling on the lower strings
Step 5 – Wash, rinse, repeat
Repeat Step 4 with the remaining strings, until your guitar has its full set of 6 (or 7, or more), strings.

Step 6 – Stretching and tuning up
At this point you can remove the stack of cards from under the bridge, if they haven’t already fallen out. Give your new strings a good stretch along the whole length of the neck and body – don’t forget behind the nut. You don’t want to stretch too hard (I have accidentally broken brand new strings on multiple occasions by stretching them too enthusiastically), but work your way up and down the neck, pulling each string a few cm off the fretboard.
Tune the strings up to pitch. It’s best to do this from low to high, as the low strings carry the most tension and large changes to these have the biggest effect on the other strings. I find that on guitars with a trem I will usually have to repeat this two or three times, tuning from low to high each time.
Step 7 – Play guitar!
It’s time to enjoy your newly strung guitar. If you need to adjust your string height or intonation you can do so now. If you aren’t sure how to do this, or don’t know if these need any adjustment, find out here.